简介
实现原理
该文档主要结合实际案例(仿"今日头条"应用)来介绍uexNBListView插件在实际项目中的应用。注意阅读该文档之前需熟读“uexNBListView插件API文档”及“自定义布局指引文档”。
 **
**
 **
**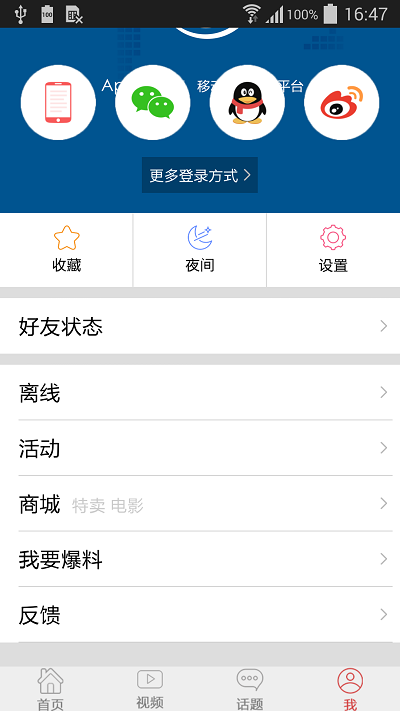
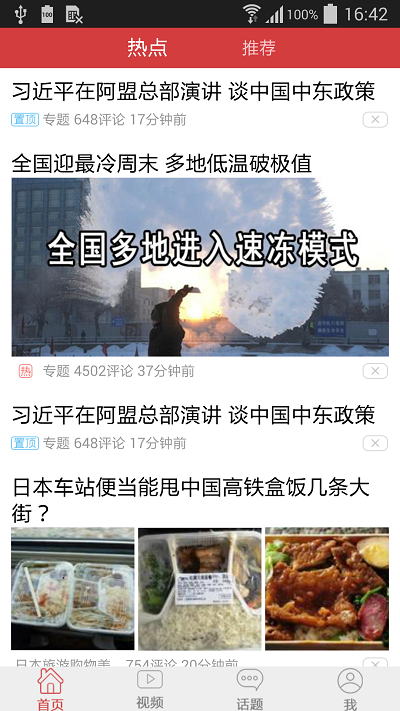
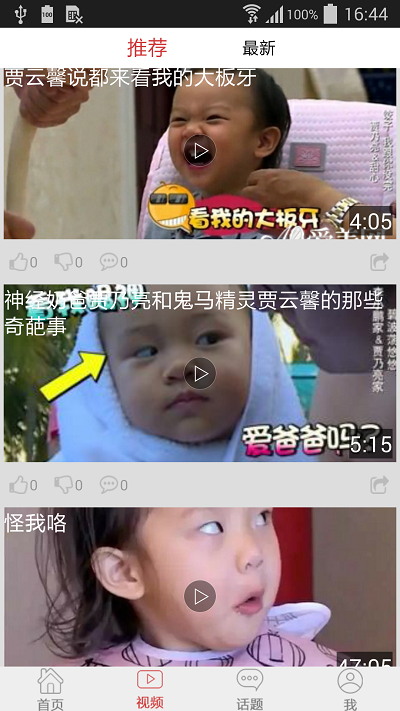
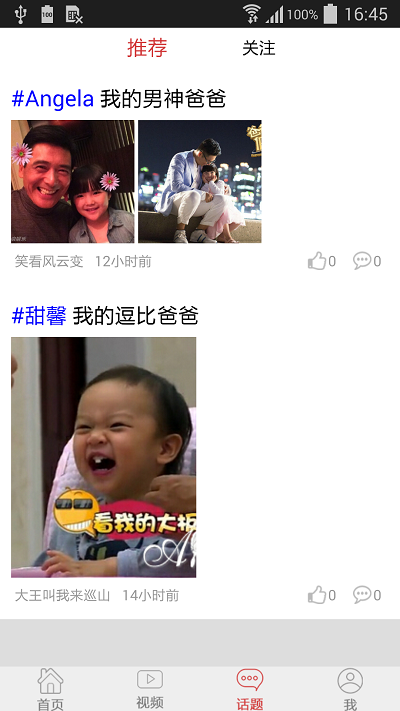
该应用中有四个tab页分别为“首页”,“视频”,“话题”和“我”,它们通过底部的按钮点击切换。其中“首页”,“视频”和“话题”页都包含头部的导航条可左右滑动切换页面。而“我”tab页只有单独的一个界面。于是该应用设计为三个容器(分别对应前三个tab页,每个容器中包含两个列表,这两个列表之间通过左右滑动切换)和一个列表(对应“我”tab页)。在底部导航栏点击之后,处理容器或列表的显示或者隐藏来实现tab页的切换效果。
该应用中需要用到左右滑动切换的效果,因此需要使用到容器。容器需要先创建,然后在打开列表时将列表添加进容器中。具体代码如下:
window.uexOnload = function(type){
    var jsonStr = {
        id : 0, //容器id
        x : 0, //容器位置x坐标
        y : top, //容器位置y坐标
        w : screen.availWidth, //容器位置w宽度
        h : height //容器位置h高度
    };
    uexWindow.createPluginViewContainer(JSON.stringify(jsonStr));

    uexWindow.cbCreatePluginViewContainer = function(opId, dataType, data) {
        if(data == "success"){
            //创建成功之后,可以向该容器中添加列表视图
            addListView(opId);
        }
    };
}

function addListView(containerId){
    openListView("listView1", containerId, 0);
    openListView("listView2", containerId, 1);
}

function openListView(listViewId, containerId, containerIndex){
    //该示例只说明容器和添加视图的流程,具体在应用中uexNBListView插件的open方法需要
    //在initLayout的回调方法之后调用。
    var params = {
        listViewId:listViewId,
        left: 0,//(必选) 左间距
        top: 0,//(必选) 上间距
        width:window.screen.width,//(必选) 宽
        height:height,//(必选) 高
        openType:2,//(可选) 打开方式,0-webView,1-window,2-容器
        containerID:containerId,
        containerIndex:containerIndex,
        swipeMode:3,//(可选) 侧滑模式,0-右滑,1-左滑,2-左右滑,3-不能滑。默认3
        refreshMode:3,//(可选) 刷新模式,0-无,1-下拉,2-上拉,3-上拉下拉。默认3
        refreshTimeout:5000//(可选)刷新超时时间,单位毫秒。在refreshMode非等于0有效,默认为3000
    }
    uexNBListView.open(JSON.stringify(params));
}
上例中的列表Id为listView1和listView2的两个列表可通过左右滑动切换。
在创建列表之前,需要先调研整个列表中有几种类型的布局,每种类型的布局哪些数据是需要动态更新的。 例如“首页”tab页中,就有四种布局,分别为:
1.纯文本不带图片的,如下:

2.文字加单张图片,图片在文字右侧,如下:

3.文字加单张图片,图片在文字之间,如下:
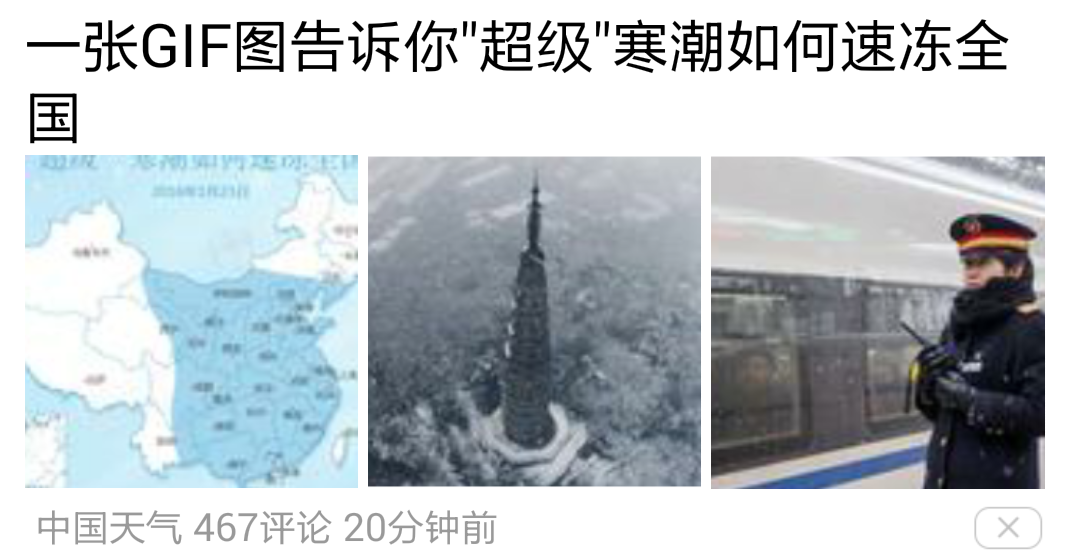
4.文字加三张图片,图片在文字之间,如下:
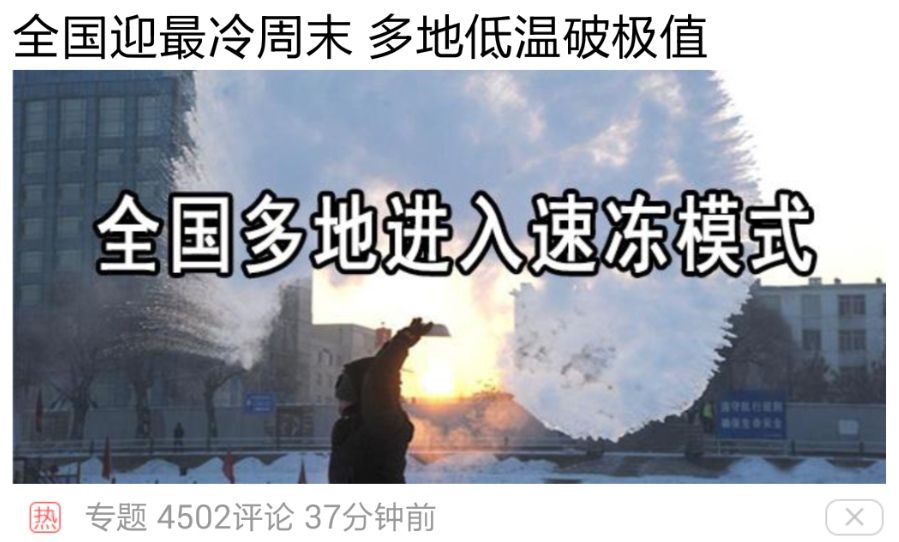
虽然该列表中会包含四种样式的布局,但并不代表就一定要定义四种样式,相似的布局可以合并,通过控件的visible属性可以控制某个控件的显示和隐藏,展现不同的效果。
例如,第一种和第三种布局即可以合并,第三种布局中把三张图片的布局隐藏掉即是第一种布局显示的效果。
布局定好之后,需要确定布局中哪些数据是需要动态变化的,例如第一种布局中的黑色文字大标题,每一条新闻大标题必然是不同的。而右下角带“X”号的图标,每一条新闻的图标都一样,则不需要动态更新。 需要动态更新的数据,则要参考“uexNBListView插件API文档”中的"数据载入方式"定义完整数据变量名称,在接口传入数据时,数据与变量一一对应。
布局代码如下: (1).layout_index_item1.xml 该布局对应第一和第三种布局,代码如下:
<?xml version="1.0" encoding="utf-8"?>
<root layoutId = "index-item1" layoutType = "${type}">
    <linearlayout id = "content" width = "-1" height = "-2" background = "#ffffff" onClick = "onItemClick" padding= "30 20">
        <text id = "title" width = "-1" height = "-2" text="${title}" textSize = "20" textColor = "#000000"/>
        <linearlayout id = "newsPic" orientation = "horizontal" width = "-1" height = "-2" visible = "${isHasPic}">
        <!--该元素表示标题下面的图片,isHasPic为0即显示时,即为第三种布局,为1隐藏时为第一种布局-->
            <img id = "newsPic1" weight ="1" width="-2" height="-2" src="${picPath1}" scale = "1" scaleType = "centerCrop"/>
            <img id = "newsPic2" weight ="1" width="-2" height="-2" src="${picPath2}" margin = "10 0 0 0" scale = "1"  scaleType = "centerCrop"/>
            <img id = "newsPic3" weight ="1" width="-2" height="-2" src="${picPath3}" margin = "10 0 0 0" scale = "1"  scaleType = "centerCrop"/>
        </linearlayout>
        <relativelayout width = "-1" height = "-2" gravity = "centerY">
            <img id = "mark" width = "75" height = "75" src = "${markImg}" visible ="${markVisible}" float = "left|centerY"/>
            <text id = "sourceType" width = "-2" height = "-2" text="${source}" textSize = "13" textColor = "#999999" relation = "rightOf,mark" margin = "10 0 0 0" float = "centerY"/>
            <text id = "comment" width = "-2" height = "-2" text="${comment}" textSize = "13" textColor = "#999999" relation = "rightOf,sourceType"  margin = "10 0 0 0" float = "centerY"/>
            <text id = "time" width = "-2" height = "-2" text="${time}" textSize = "13" textColor = "#999999" relation = "rightOf,comment"  margin = "10 0 0 0" float = "centerY"/>
            <img id = "delete" width = "75" height = "75" src = "res://img/del.png" float = "right|centerY" onClick = "onDeleteClick"/>
        </relativelayout>
    </linearlayout>
</root>
(2).layout_index_item2.xml 该布局对应第二种布局,代码如下:
<?xml version="1.0" encoding="utf-8"?>
<root layoutId = "index-item2">
    <!--该布局为右边有一小图样式布局-->
    <linearlayout id = "content" width = "-1" height = "-2" onClick = "onItemClick" background = "#ffffff" orientation = "horizontal" gravity = "centerY" padding= "30 20">
        <linearlayout width = "-2" height = "-2" weight = "1">
            <text id = "title" width = "-1" height = "-2" text="${title}" textSize = "20" textColor = "#000000"/>
            <relativelayout width = "-1" height = "-2" gravity = "centerY">
                <img id = "mark" width = "75" height = "75" src = "${markImg}" visible ="${markVisible}" float = "left|centerY"/>
                <text id = "sourceType" width = "-2" height = "-2" text="${source}" textSize = "13" textColor = "#999999" relation = "rightOf,mark" margin = "10 0 0 0" float = "centerY"/>
                <text id = "comment" width = "-2" height = "-2" text="${comment}" textSize = "13" textColor = "#999999" relation = "rightOf,sourceType"  margin = "10 0 0 0" float = "centerY"/>
                <text id = "time" width = "-2" height = "-2" text="${time}" textSize = "13" textColor = "#999999" relation = "rightOf,comment"  margin = "10 0 0 0" float = "centerY"/>
                <img id = "delete" width = "75" height = "75" src = "res://img/del.png" float = "right|centerY" onClick = "onDeleteClick"/>
            </relativelayout>
        </linearlayout>
        <img id = "newsPic" width="300" height="-2" src="${picPath}" />
    </linearlayout>
</root>
(3).layout_index_item3.xml 该布局对应第三种布局,代码如下:
<?xml version="1.0" encoding="utf-8"?>
<root layoutId = "index-item3">
    <!--该布局为有一个大标题和一张大图样式布局-->
    <linearlayout id = "content" width = "-1" height = "-2" background = "#ffffff" onClick = "onItemClick" padding= "30 20">
        <text id = "title" width = "-1" height = "-2" text="${title}" textSize = "20" textColor = "#000000"/>
        <img id = "newsPic" width="-2" height="-2" src="${picPath}" />
        <relativelayout width = "-1" height = "-2" gravity = "centerY">
            <img id = "mark" width = "75" height = "75" src = "${markImg}" visible ="${markVisible}" float = "left|centerY"/>
            <text id = "sourceType" width = "-2" height = "-2" text="${source}" textSize = "13" textColor = "#999999" relation = "rightOf,mark" margin = "10 0 0 0" float = "centerY"/>
            <text id = "comment" width = "-2" height = "-2" text="${comment}" textSize = "13" textColor = "#999999" relation = "rightOf,sourceType"  margin = "10 0 0 0" float = "centerY"/>
            <text id = "time" width = "-2" height = "-2" text="${time}" textSize = "13" textColor = "#999999" relation = "rightOf,comment"  margin = "10 0 0 0" float = "centerY"/>
            <img id = "delete" width = "75" height = "75" src = "res://img/del.png" float = "right|centerY" onClick = "onDeleteClick"/>
        </relativelayout>
    </linearlayout>
</root>
定义好布局文件之后,调用插件的initLayout接口,如下:
    var params = {
        listViewId:id,
        layout:{
            center:["res://layout_index_item1.xml",
            "res://layout_index_item2.xml",
            "res://layout_index_item3.xml"]
        }
    }
    uexNBListView.initLayout(JSON.stringify(params));
其中center关键字表示主布局数组,数组元素为布局文件的存放路径,只支持本地文件。
在initLayout的回调方法cbInitLayout之后可调用设置数据方法setItems。代码如下:
    uexNBListView.cbInitLayout = function(data){
        var data = JSON.parse(data);
        if(data.errorCode == 0){
            //初始化成功
            setIndexItem1(data.listViewId);
        }
    }

function setIndexItem1(id){
    var params = {
        listViewId:id,
        dataList:[
            {
                center:{
                    "type":"index-item1",
                    "title":"习近平在阿盟总部演讲 谈中国中东政策",
                    "isHasPic":1,
                    "markImg":"res://img/top.png",
                    "markVisible":0,
                    "source":"专题",
                    "comment":"648评论",
                    "time":"17分钟前"
                }
            },
            {
                center:{
                    "layoutId":"index-item2",
                    "title":"福建7名贪官结拜兄弟对抗组织 被称葫芦娃组合",
                    "markImg":"res://img/hot.png",
                    "markVisible":0,
                    "source":"中国经济网",
                    "comment":"2962评论",
                    "time":"",
                    "picPath":"res://img/news/news1.png"
                }
            },
            {
                center:{
                    "layoutId":"index-item3",
                    "title":"全国迎最冷周末 多地低温破极值",
                    "picPath":"res://img/news/news2.png",
                    "markImg":"res://img/hot.png",
                    "markVisible":0,
                    "source":"专题",
                    "comment":"4502评论",
                    "time":"37分钟前"
                }
            },
            {
                center:{
                    "type":"index-item1",
                    "title":"习近平在阿盟总部演讲 谈中国中东政策",
                    "isHasPic":1,
                    "markImg":"res://img/top.png",
                    "markVisible":0,
                    "source":"专题",
                    "comment":"648评论",
                    "time":"17分钟前"
                }
            },
            {
                center:{
                    "type":"index-item1",
                    "title":"日本车站便当能甩中国高铁盒饭几条大街?",
                    "isHasPic":0,
                    "picPath1":"res://img/news/news3.png",
                    "picPath2":"res://img/news/news4.png",
                    "picPath3":"res://img/news/news5.png",
                    "markImg":"res://img/hot.png",
                    "markVisible":1,
                    "source":"日本旅游购物美...",
                    "comment":"754评论",
                    "time":"20分钟前"
                }
            }
        ]
    }
    uexNBListView.setItems(JSON.stringify(params));
}
需要注意的是dataList的主数据中的键值是与布局文件中定义的变量值对应的,同时布局文件中定义为形如${XXX}样式的属性变量,必须在接口数据中传入对应的值,否则显示异常。
数据设置完成之后,在setItems的回调方法cbSetItems中调用打开列表视图方法open,如下:
    uexNBListView.cbSetItems = function(data){
        var data = JSON.parse(data);
        if(data.errorCode == 0){
            //初始化成功
            openListView(data.listViewId,0,0);
        }
    }
其中openListView方法同上文中容器的创建示例点击查看,其中容器id为0的容器需要提前创建成功,否则会打开失败。调用open方法之后,若已经设置过数据,列表会直接显示,若没有设置过数据,则列表不显示。
显示效果如下:

列表数据的更新有以下几种方法:
1.重置列表数据,通过setItems方法实现;
2.更新列表中某一个item中的某一项数据,通过update方法实现;
3.向列表的某一位置添加一个item,通过insert方法实现;
4.从列表中删除一个item,通过delete方法实现。
具体可参考源码示例及uexNBListView插件API文档。